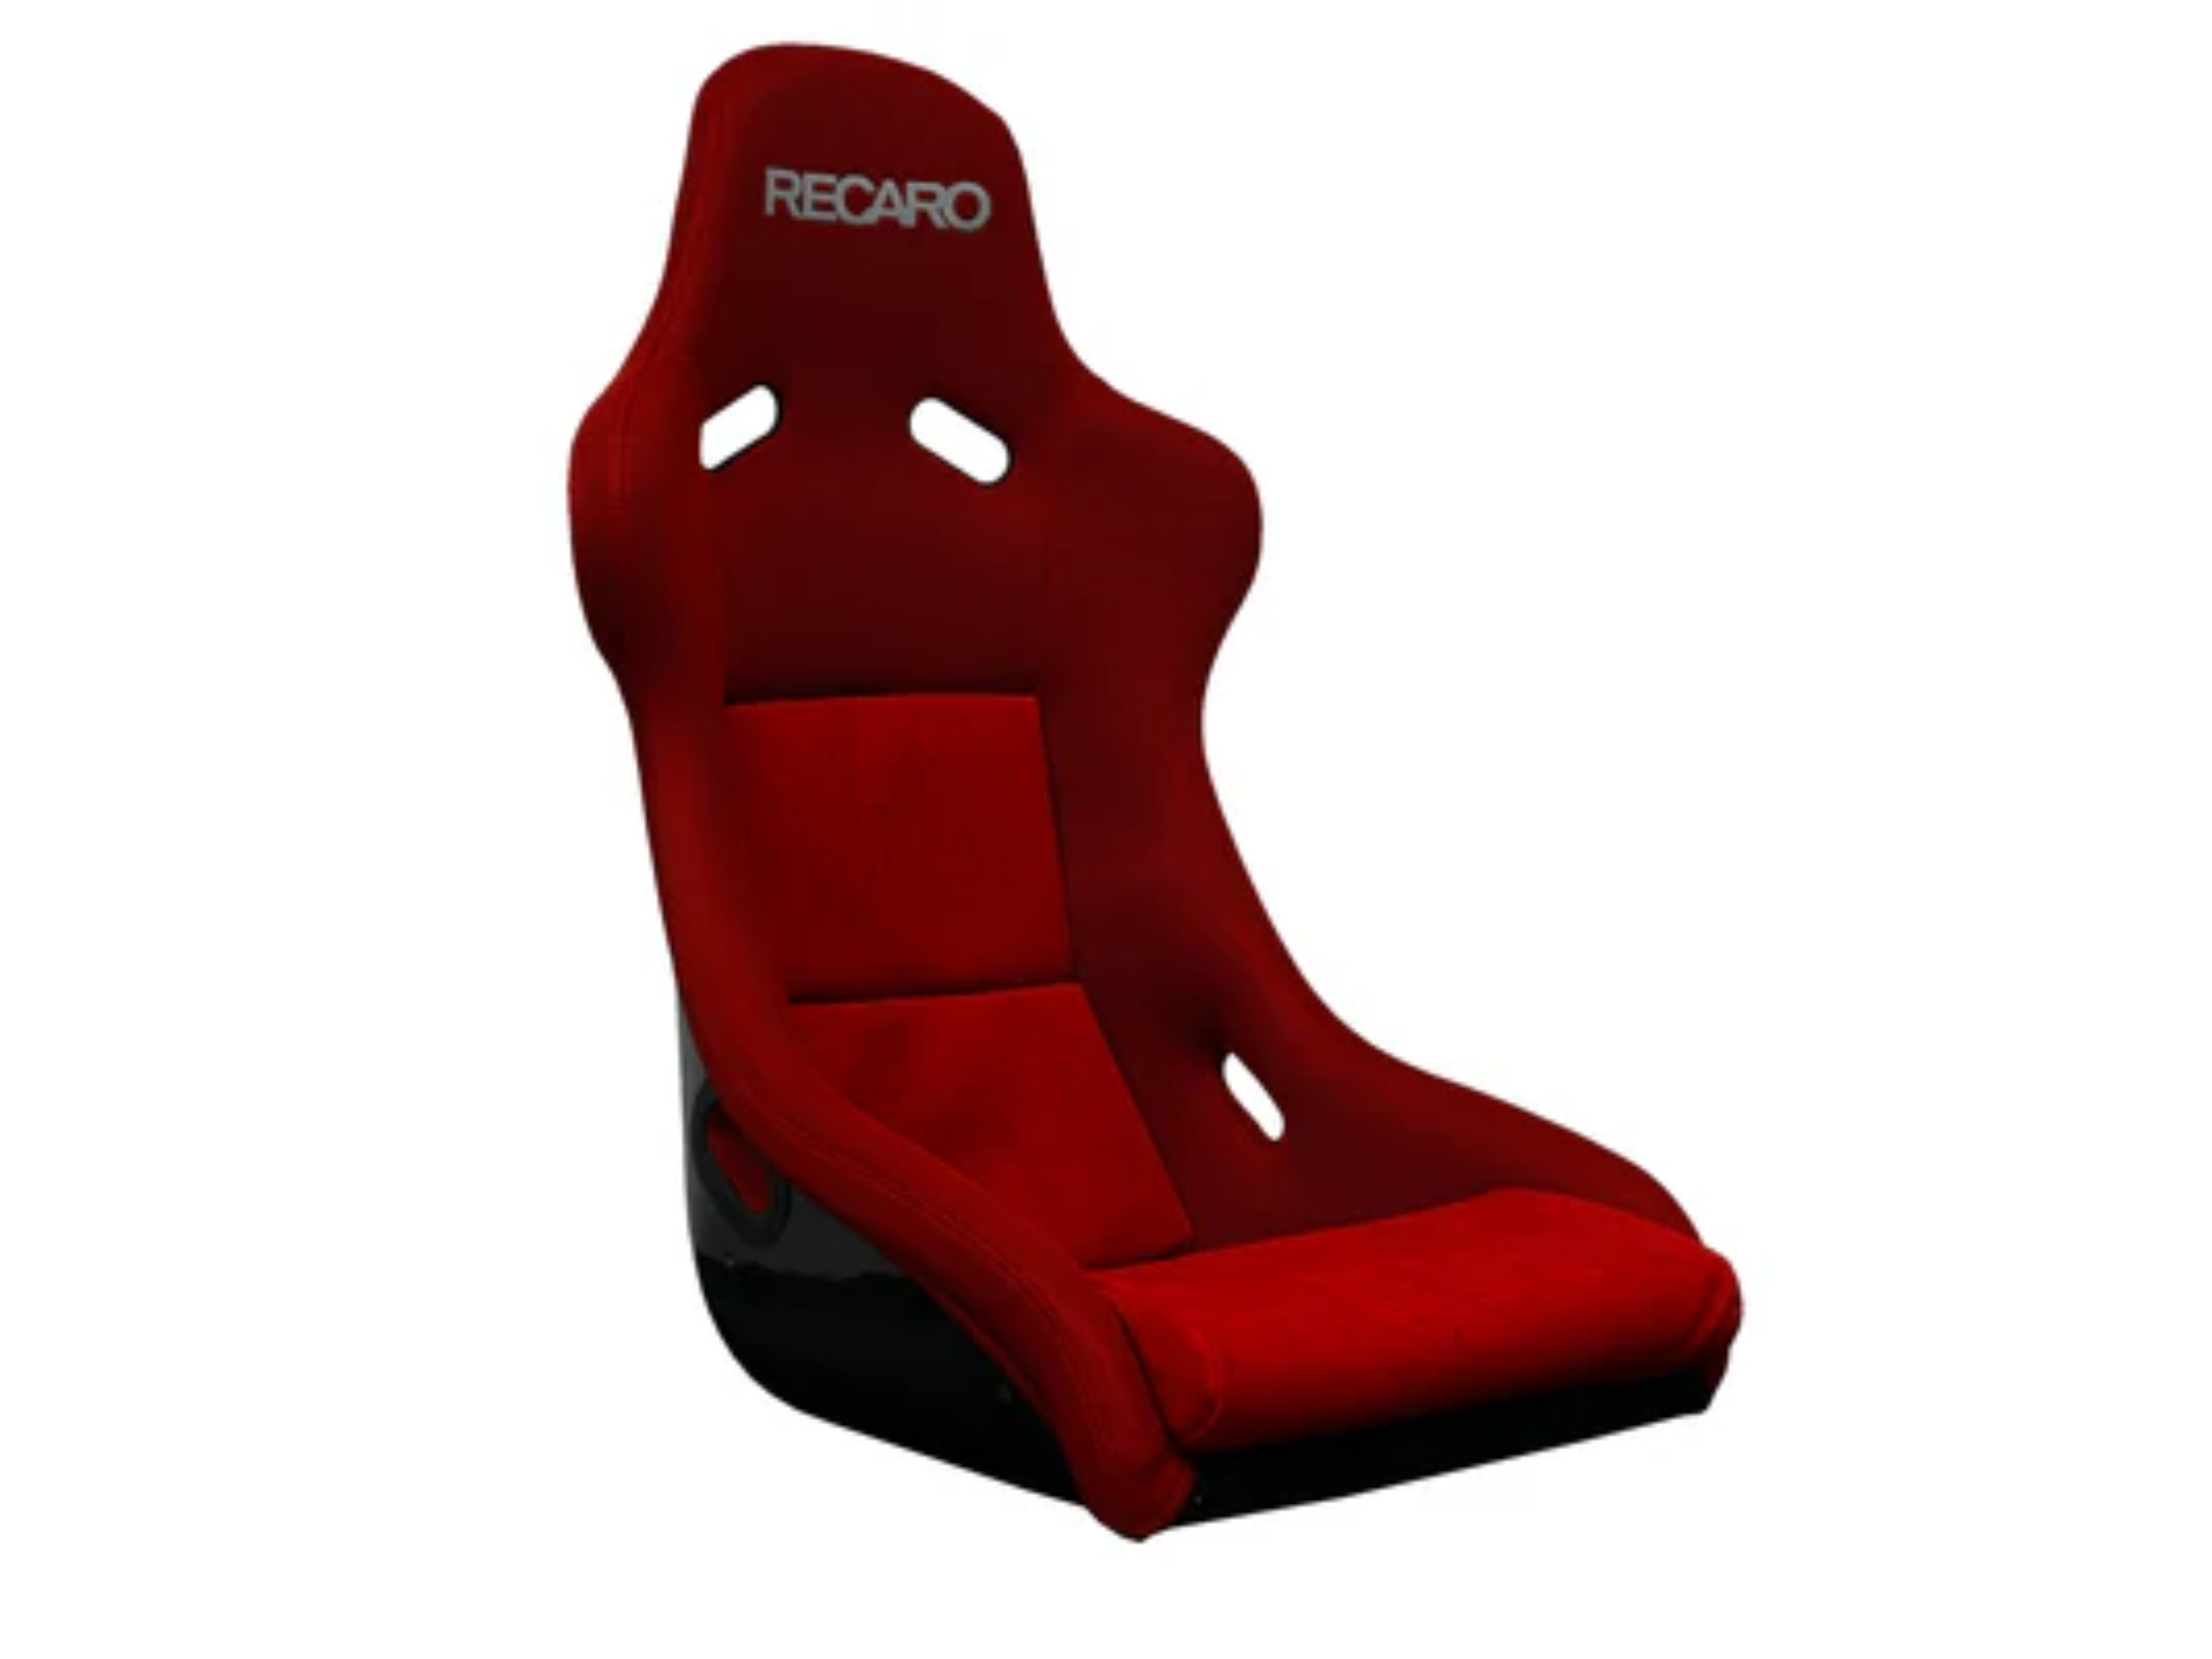
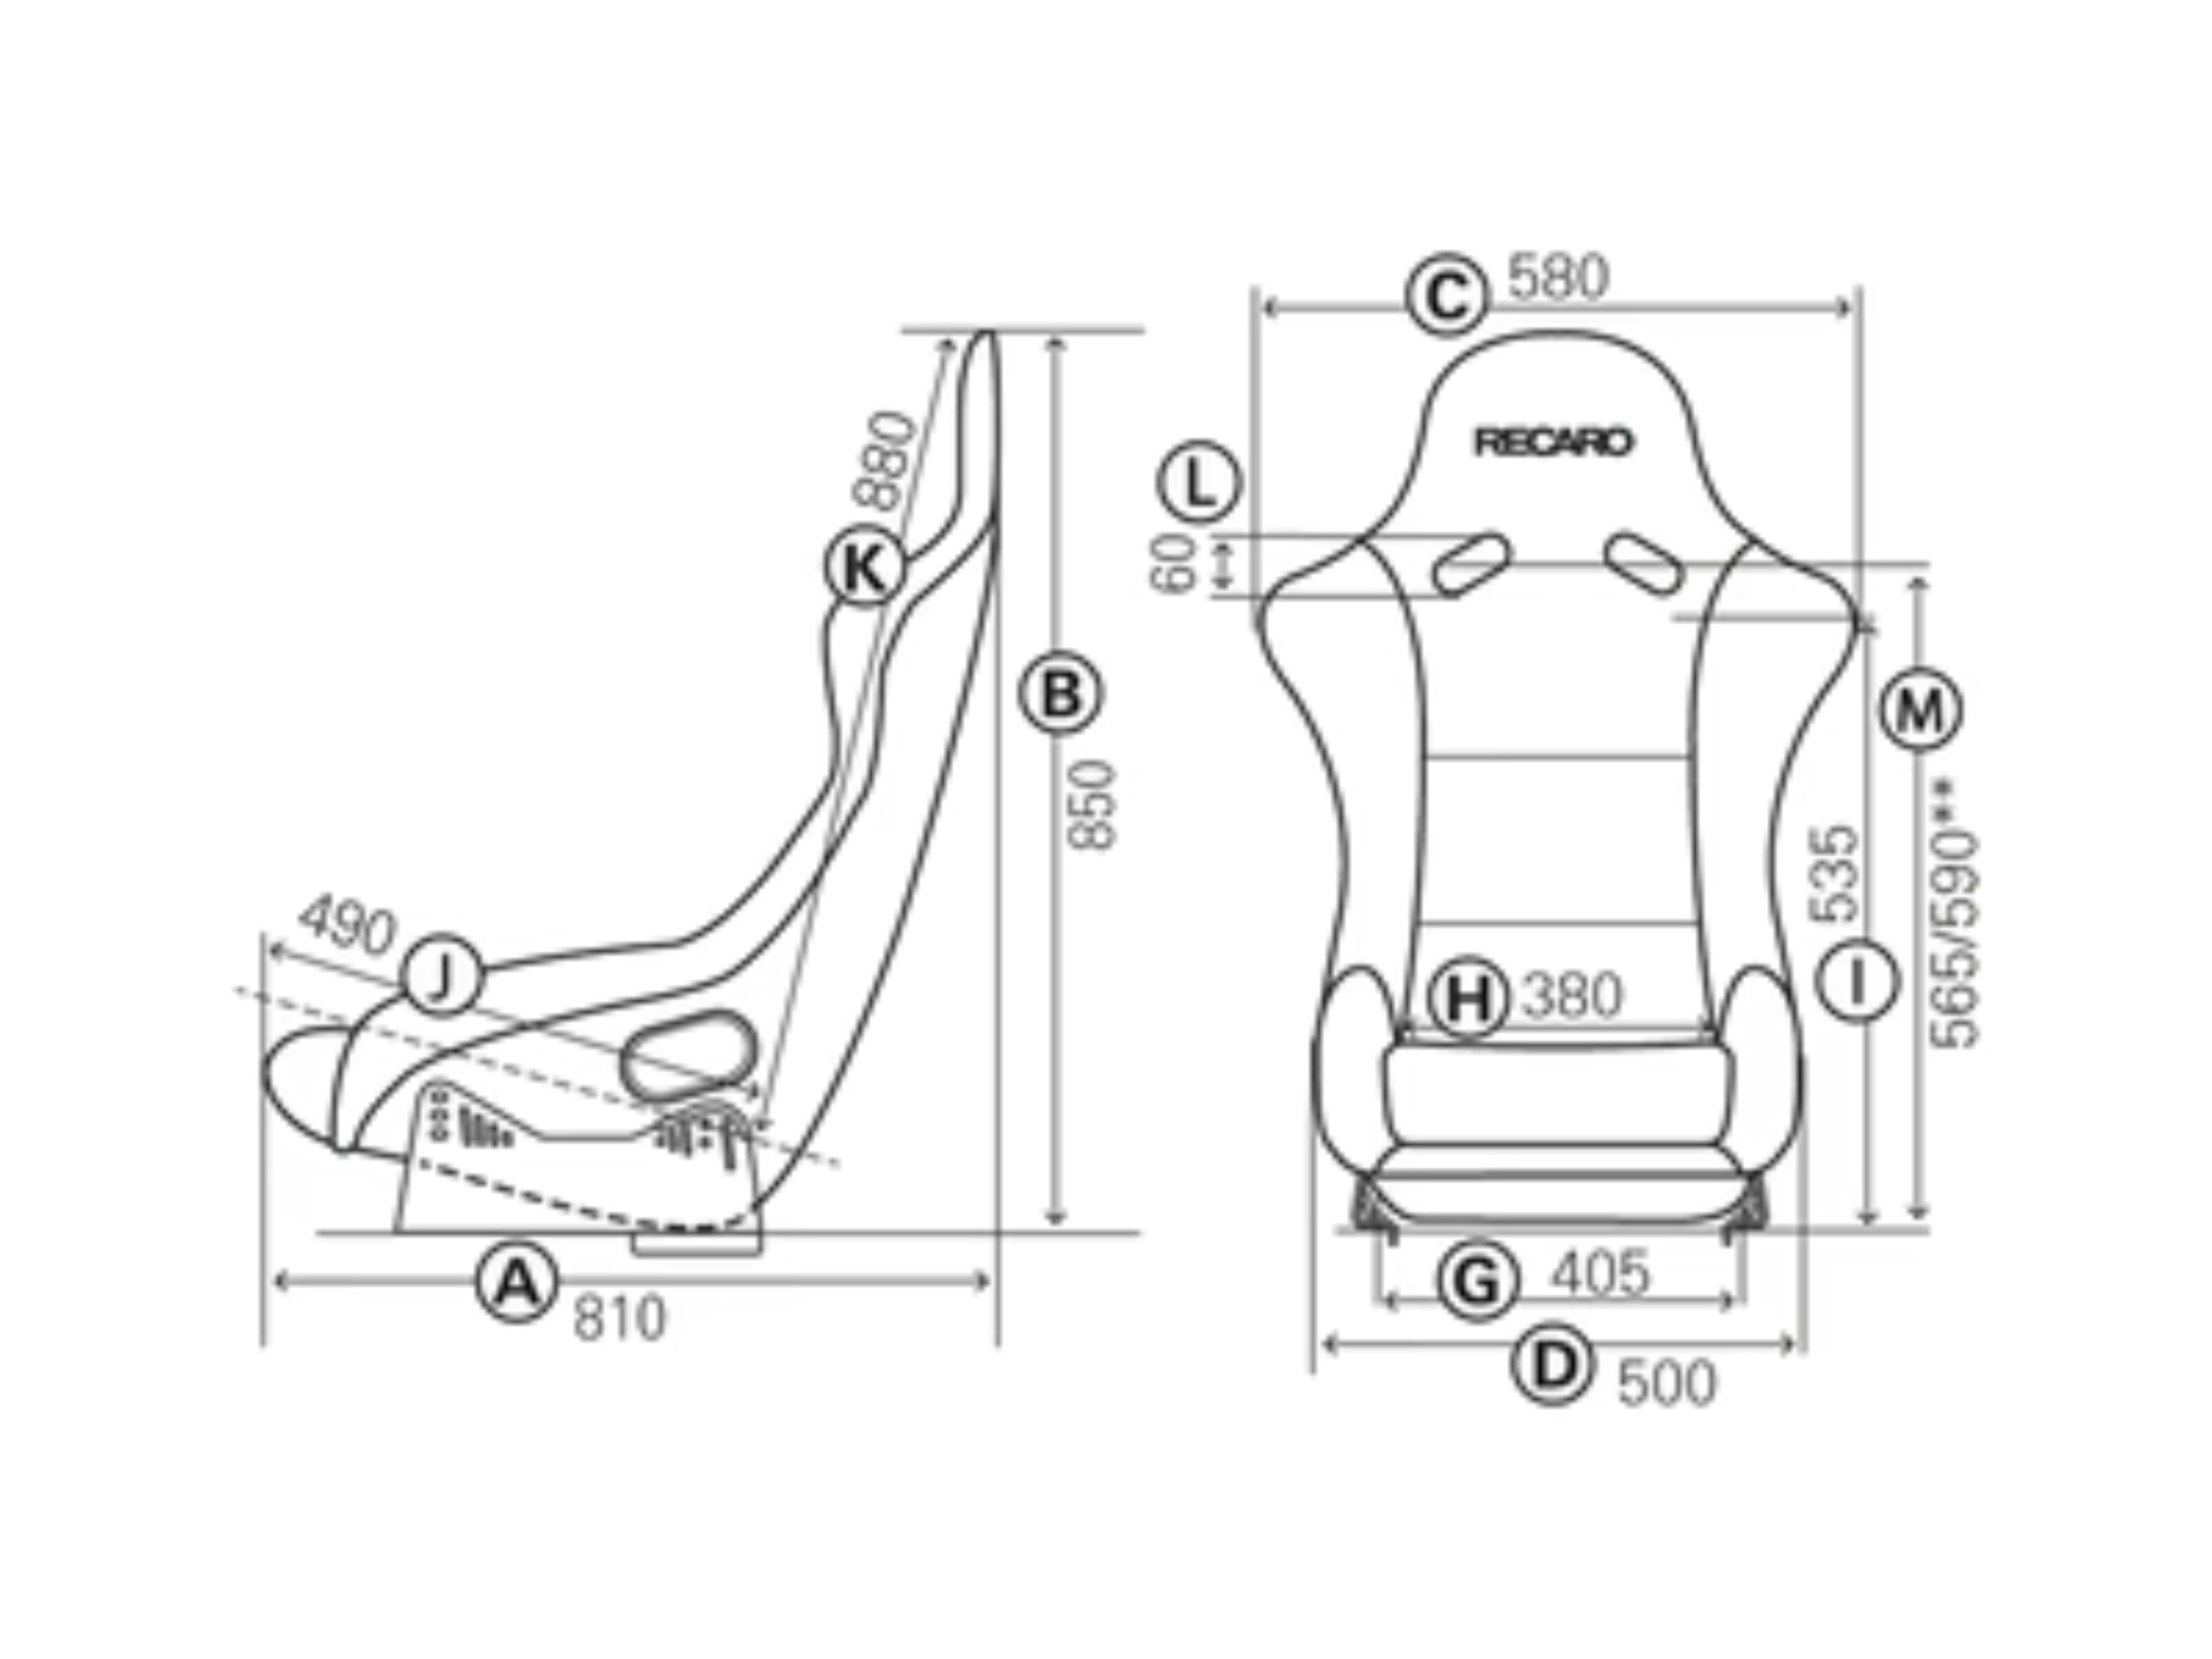
ant a racing seat that gives you the edge? The Recaro Pole Position N.G. Bucket Seat (FIA) - Jersey Red with Suede seat is designed for ultimate performance and comfort, perfect for racing simulators.
Key Features:
-
Durable Shell: Made from glass fiber reinforced plastic (GFRP).
-
Safety First: Compatible with 4-, 5-, or 6-point racing belts.
-
Comfortable Fit: Paddable lumbar support and replaceable cushions.
-
Flame-Retardant Upholstery: Keeps you safe and secure.
-
Lightweight: Weighs only 7.7kg without brackets.
Perfect for anyone looking to build a realistic, high-performance racing setup!