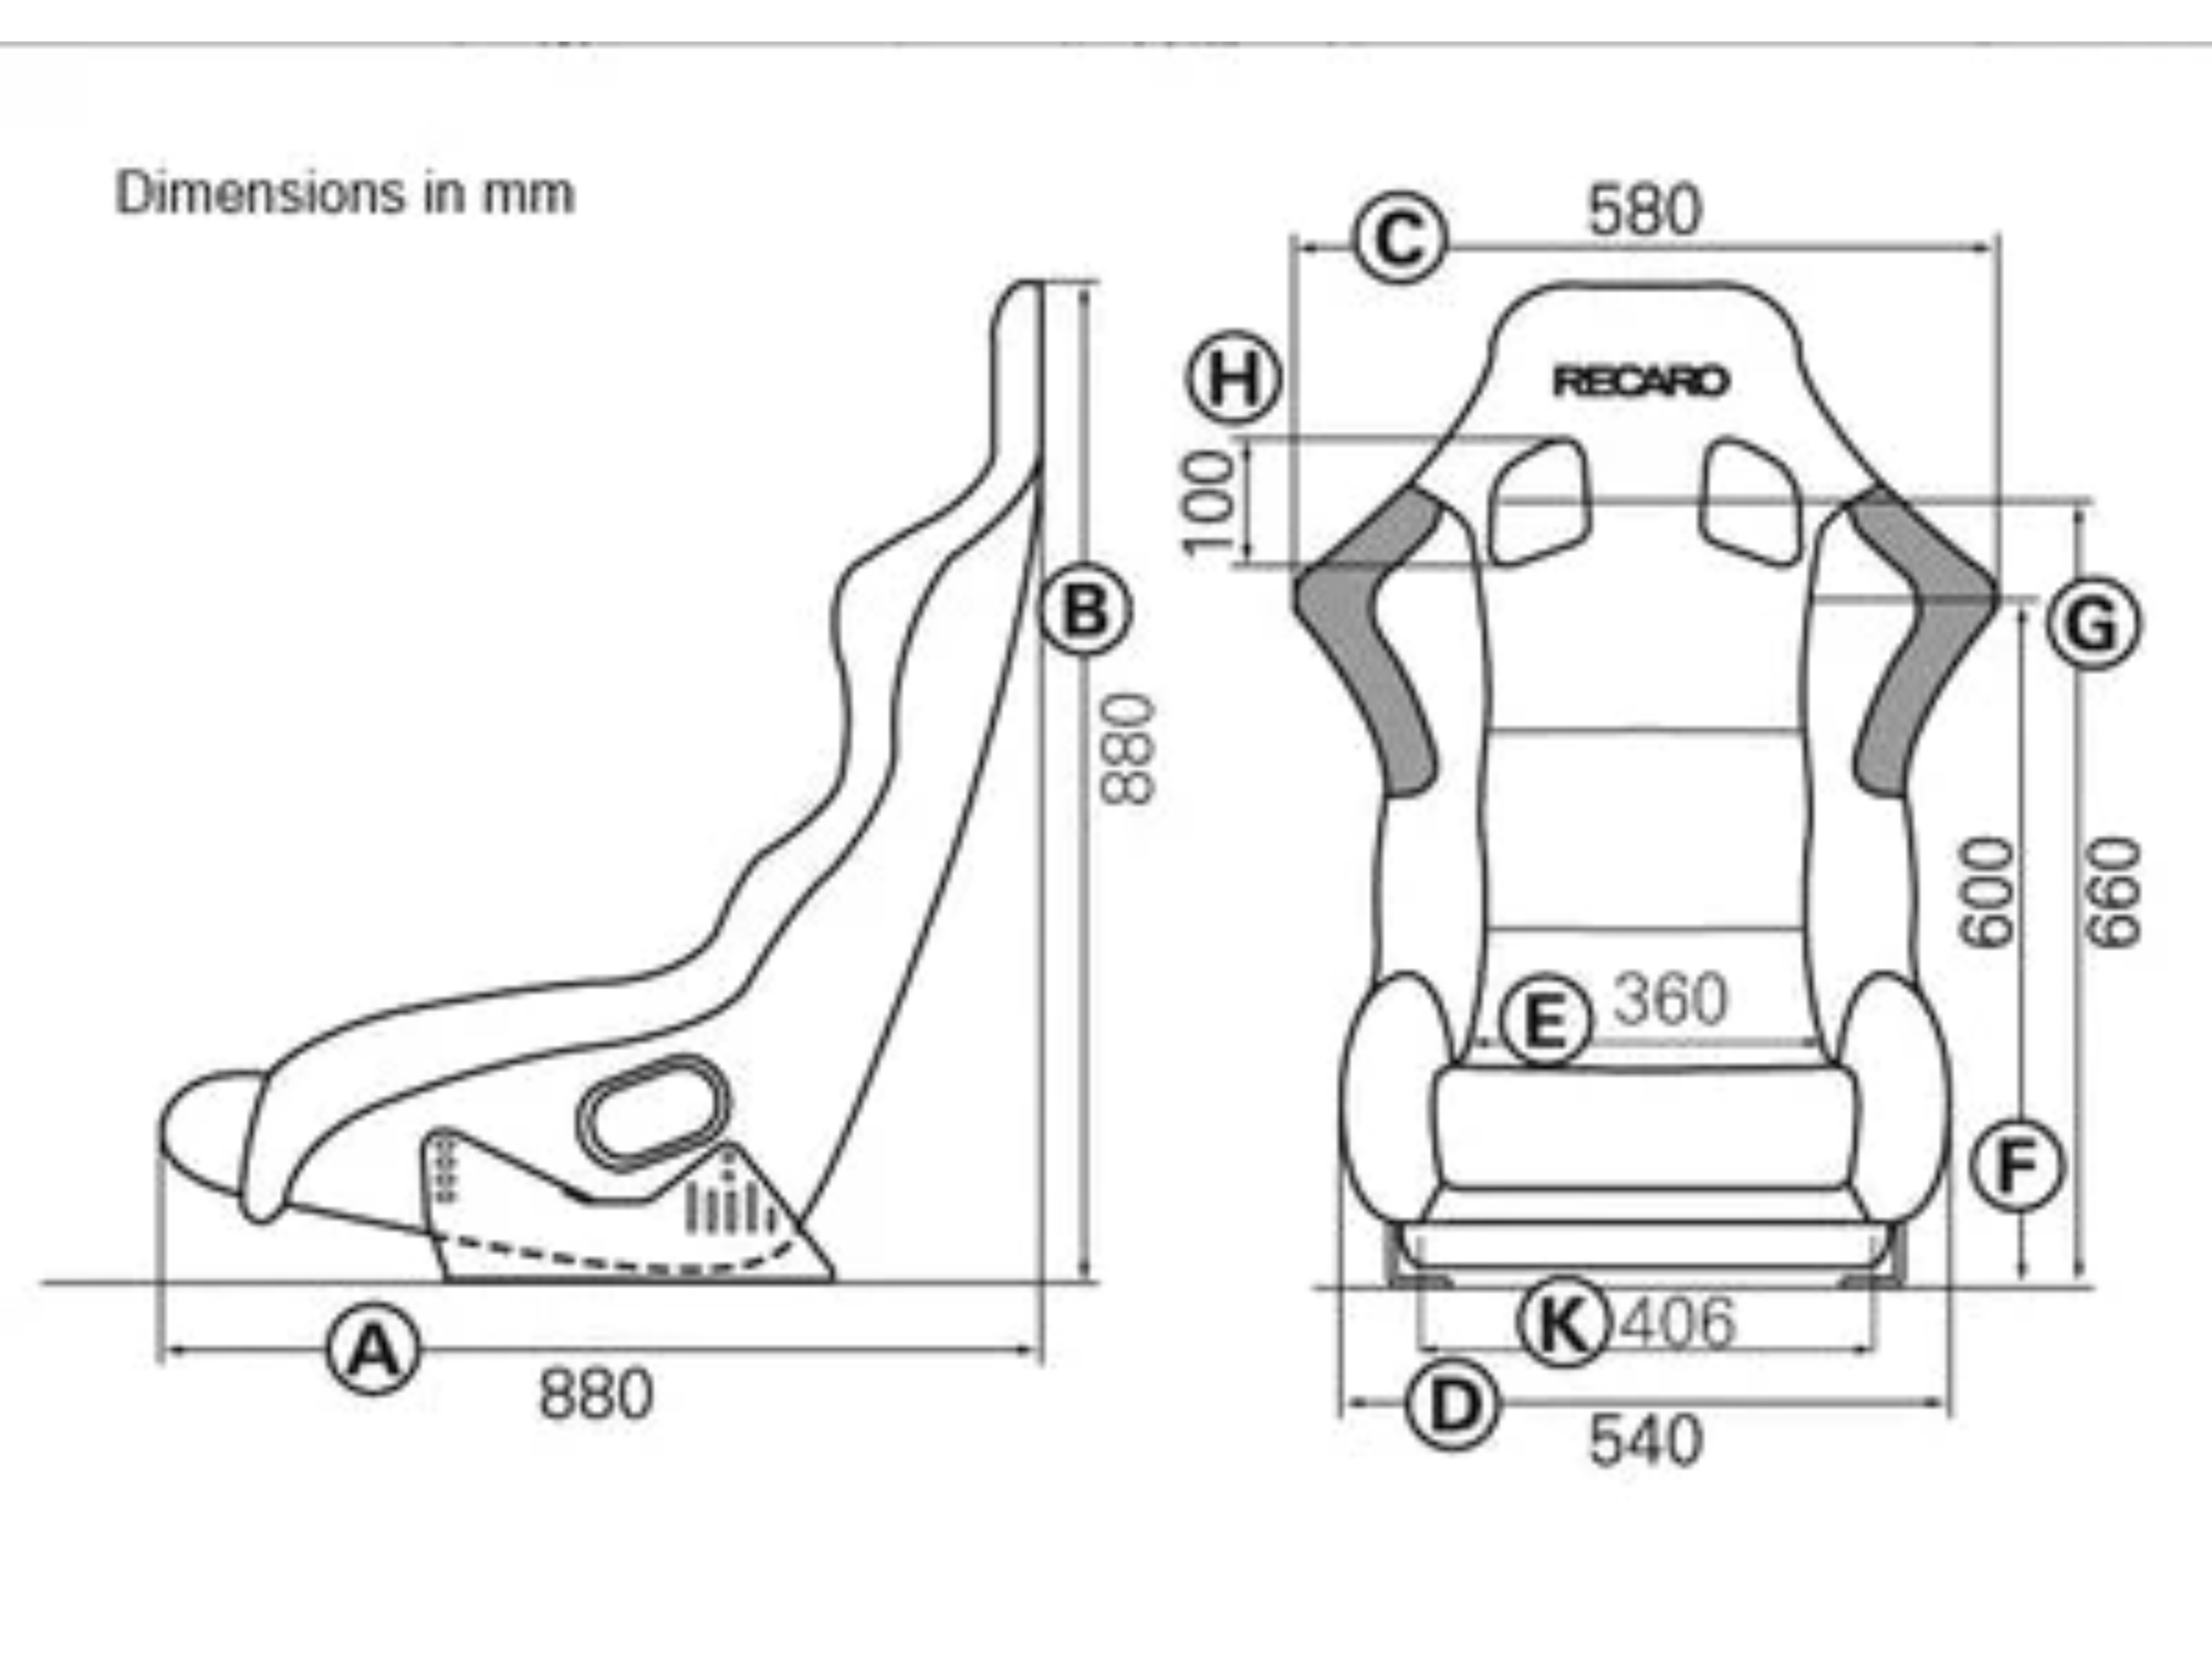
Want a racing simulator seat that holds you tight—even on the sharpest turns? The Recaro Profi SPG XL Bucket Seat (FIA) - BLK Velour is a high-performance seat made for realistic racing simulator setups. It’s wider, taller, and built for serious drivers who want the best feel and support.
Why it’s great:
-
Made by RECARO, a top name in racing seats
-
Strong and lightweight shell (glass fiber reinforced plastic)
-
XL size: 35mm wider, 50mm taller for bigger builds
-
Works with 4-, 5-, or 6-point harnesses
-
Shoulder grip zones to keep you locked in
-
Flame-retardant padding for safety
-
Only 10kg without brackets
Perfect for building a realistic racing simulator that feels just like the real track.